
What I am doing?
I assess your Microsoft Project schedule, identify potential quality issues, and highlight areas that may require attention to improve schedule reliability.
Try Me. I’m Free!
What is Schedule Lupe?
Schedule Lupe is a Microsoft Project add-in that performs an automated schedule quality assessment directly inside Microsoft Project. The add-in analyzes your project plan and identifies common scheduling issues based on widely accepted planning and scheduling best practices. Instead of manually reviewing hundreds or thousands of tasks, Schedule Lupe highlights the criteria that require attention and helps planners focus on the areas that matter most.
Schedule Lupe is built as a modern Microsoft Office Add-in. This allows the tool to run directly inside Microsoft Project without requiring complex installation procedures.
Why “Lupe”?
A Lupe (magnifying glass) helps people inspect details that are easy to overlook. Schedule Lupe does the same for project schedules. It helps planners identify hidden issues before they become project problems.
Installation Guide
Follow the steps below to install and use the Schedule Lupe Add-in in Microsoft Project.
Step 1: Download the Add-in File
Download the add-in manifest file from the following link:
Save the file to your computer.
Step 2: Create a Shared Folder
- Create a folder on your computer or a network drive.
- Copy the downloaded ScheduleLupeManifest.xml file into this folder.
- Share the folder with other users in your organization.
- Note the folder path (for example:
\\Server\ScheduleLupe).
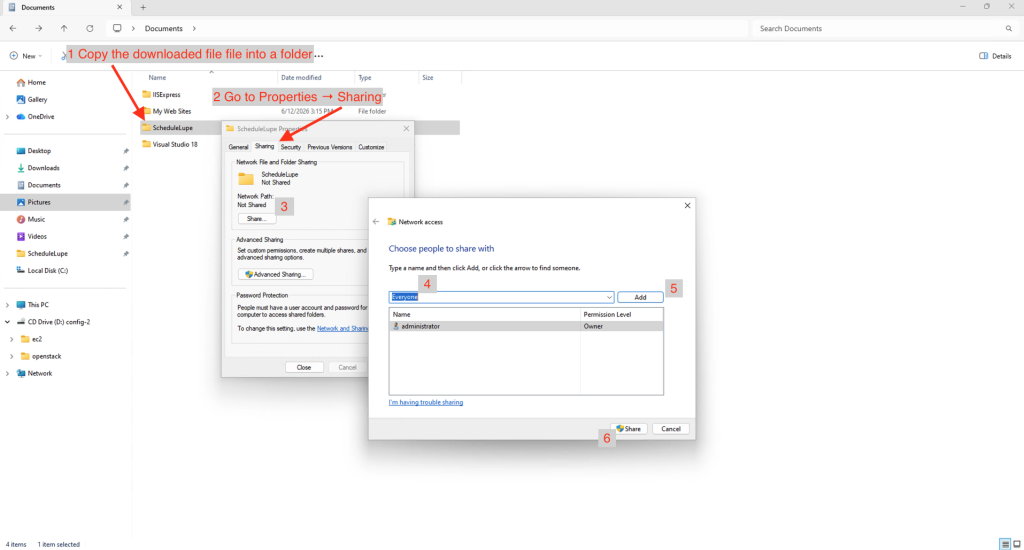
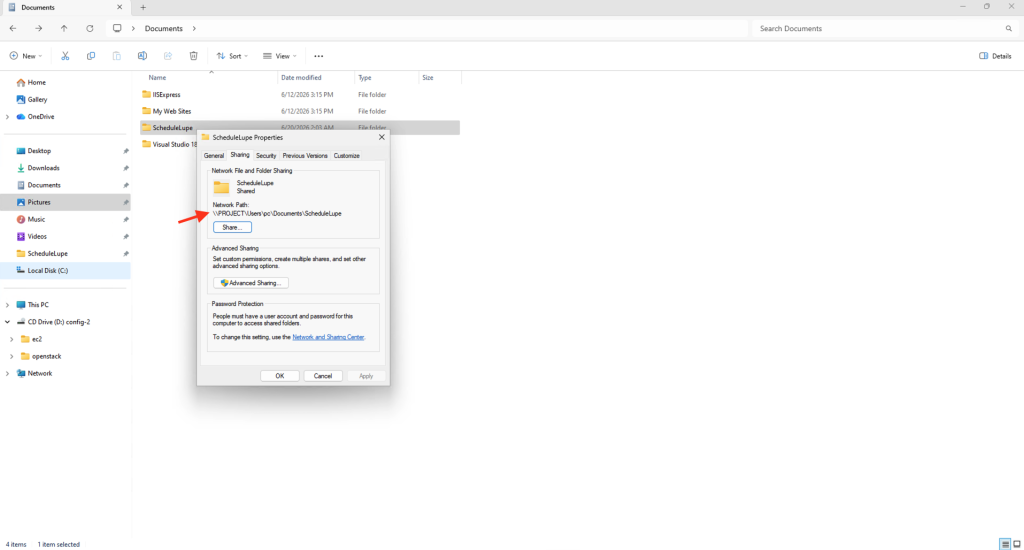
This shared folder address will be used later in Microsoft Project. If the folder is shared with everyone in your organization, all users can install the add-in from the same location.
Step 3: Add the Shared Folder to Trusted Add-in Catalogs
- Open Microsoft Project.
- Go to File → Options → Trust Center.
- Click Trust Center Settings.
- Select Trusted Add-in Catalogs.
- In the Catalog URL field, enter the shared folder path created in Step 2.
- Check Show in Menu.
- Click Add Catalog and then OK.


Step 4: Restart Microsoft Project
Close Microsoft Project completely and open it again.
Step 5: Install the Add-in
- Open Microsoft Project.
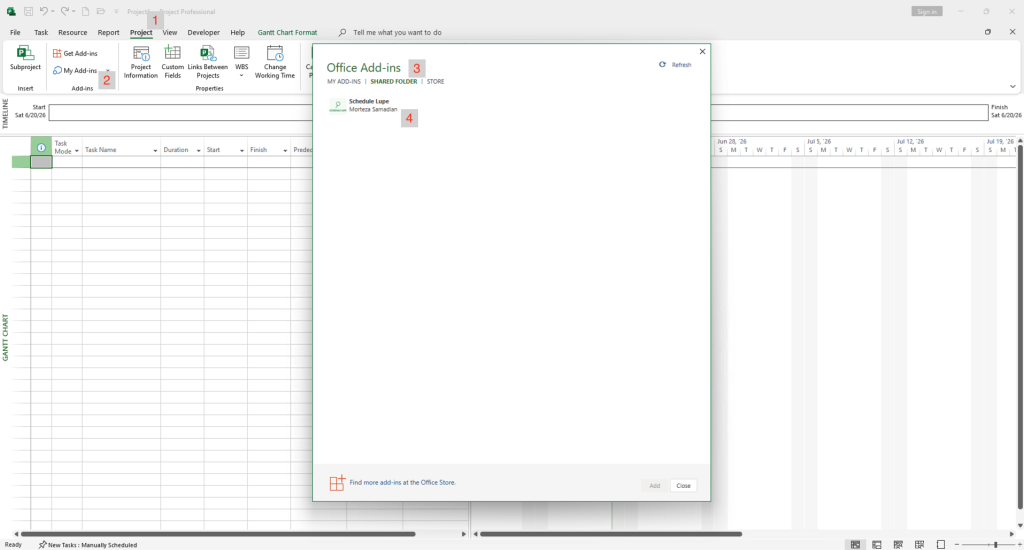
- Go to Project → My Add-ins.
- Select Shared Folder.
- Locate Schedule Lupe in the list of available add-ins.
- Click Add.
Step 6: Use the Add-in
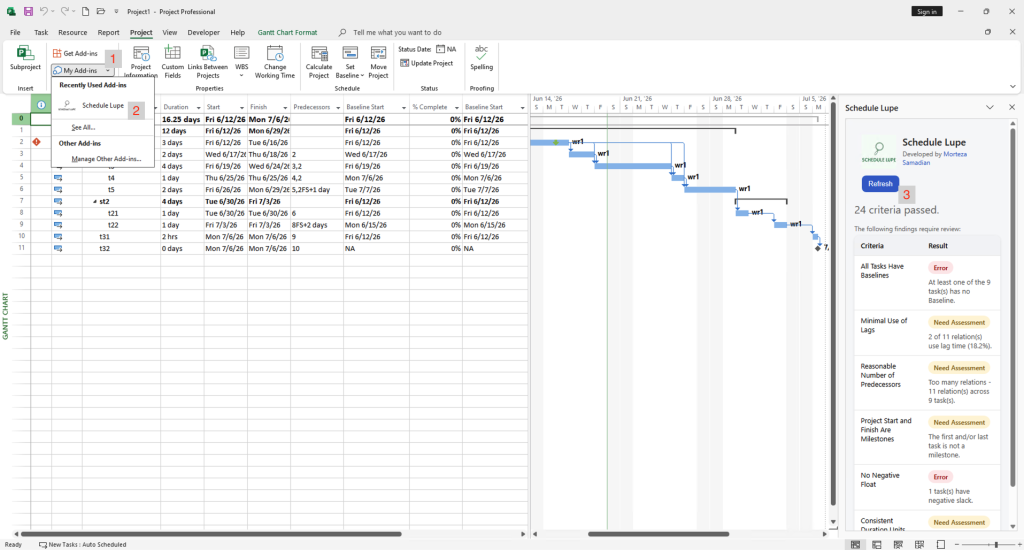
- Open the project you want to analyze.
- Click the Schedule Lupe button in the Microsoft Project ribbon.
- The Schedule Lupe task pane will open and display the project report.
Important Note
If you have multiple Microsoft Project files open and the report shown in Schedule Lupe does not match the active project:
- Close the Schedule Lupe task pane.
- Activate the desired project window.
- Open the Schedule Lupe add-in again from the ribbon.
The report will refresh and display information for the currently active project.